Fire photography is one of the most exciting genres of photography. It’s a great way to take powerful shots, using only fire as props. But fire photography can be tricky. You will have to deal with unpredictable lighting conditions as you shoot the flame. Sometimes, the lighting from the flame and the dark background can confuse your camera leading to blurry images. To avoid these problems, here are some fire photography ideas and tips to help you take pictures of fire and avoid issues along the way.
Take Photo of a Bonfire
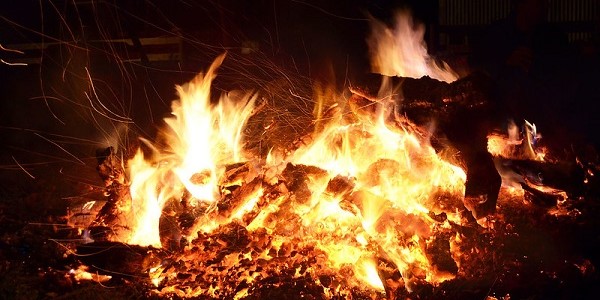
One of the best ways to experiment with fire photography or flame images is to take photos of a bonfire or campfire images. Since campfire or bonfires produce large flames, they are less challenging to shoot, unlike with candles. Moreover, the large flames of the bonfires can offer more lighting, which helps the photos look better.
To take bonfire or campfire images, have some people sit by the flame. Bonfires are the perfect opportunity to take candid shots as well. If you want to add more lighting to the images, be careful not to overexpose them. It is better to underexpose the photos since you can recover the shadows once you edit them. But if you overexpose, they could lose a lot of image data and will look unflattering.
You will get even better results with longer exposure. If you focus on shooting the bonfire itself, use a fast shutter speed and freeze the moment. Consider increasing the ISO to make the image appear even brighter.
Capture an Interesting Silhouette By the Fire
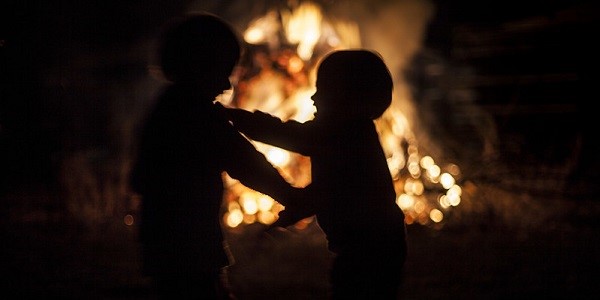
Another way to experiment with fire or flame images is to take silhouette images. Silhouettes are a great way to take mysterious portrait shots of people without showing their faces. To capture silhouette photos, have the subject stand in front of a large bonfire. The silhouette will stand out even more under a pitch-black night.
When using a wider aperture, remember that this will give you a narrow depth of field. Use manual focus when pointing to the silhouettes to capture a sharp image.
Shoot the Candle Lights
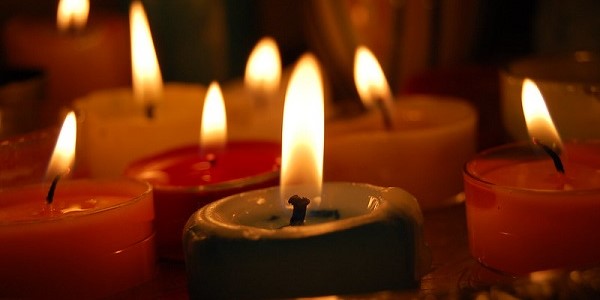
One of the easiest ways to experiment with fire photography or flame images is to shoot candle lights. You probably have some candles lying somewhere. So, take advantage of these to practice fire photography in the comfort of your home. But take note that candles can be somewhat tricky to work with. They will not give off too much light on their own. Therefore, you may need to use plenty of candles to get the results that you want.
Since the contrast between the surroundings and the candles could be high, you need to be mindful of the exposure settings. When shooting still photos of the candles, you may need to use a shutter speed that is not too long, such as 1/80. If you want to include people in the shot, using a long shutter speed could result in motion blur, so it is best to use a faster shutter speed. But when doing so, increase the ISO and open up the aperture. The same technique can apply to fireplace photography, which you can also practice in the comfort of your home.
Photograph Fire Shows or Fireworks

Taking photos of fireworks can be somewhat tricky since they are very unpredictable. Sometimes, it’s hard to capture the exact shots that you have envisioned in mind. There’s often a lot of hit or miss stuff when taking photos of fireworks. But the best thing you can do is shoot at a wider angle, then crop the image when editing it afterward.
When shooting the fireworks, look for an area that will give you a clearer view of the sky and use a tripod. The best time to shoot fireworks is during the 4th of July or other holiday celebrations that involve firework displays.
Depending on the volume of the fireworks, you can opt for a longer shutter speed between 1 and 5 seconds. But avoid using too long exposures since you could mess up the colors and lines. For longer exposure, use an ISO that’s somewhat low, somewhere between 100 and 400. Avoid an aperture that’s too wide since you still have to maintain a dark background. Switch the setting to manual focus, so your camera will not start searching for focus again and then lose it.
Include the Smoke
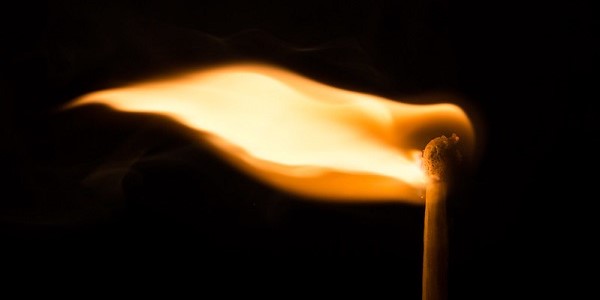
The smoke can help make your fire photos look even more interesting, so try to include them if they are present. But if there’s no smoke available, there are steps you can take to make sure that it is there.
One way to maximize the smoke output is to use wood or paper in fueling the fire. Fuels that are more efficient at producing fire, such as a gas-powered torch, may not emit plenty of smoke, so you better avoid using them if you want to include smoke in the fire photos.
When capturing fire with smoke, use a shutter speed that’s faster enough to freeze the trails of smoke. Slower shutters could make the smoke look like haze and could affect the overall quality of the images.
Always Exercise Caution
We’ve always been told that playing with fire will get you burned. Therefore, always exercise caution when experimenting with fire photography. Make safety a priority regardless of the type of fire you’re trying to shoot, especially when shooting indoors. The flames could go out of control and burn your house. If you are not careful, you could burn your skin, and the heat and smoke could potentially damage your camera and other equipment.
To ensure safety when practicing fire photography, avoid working too close to things that can easily ignite a fire. When photographing fire indoors, choose areas with well-ventilated rooms. Get an assistant to help you safely set up the props and watch out for the fire while you focus on taking good shots. More importantly, make sure you have an emergency plan in case something goes wrong during your photo session.