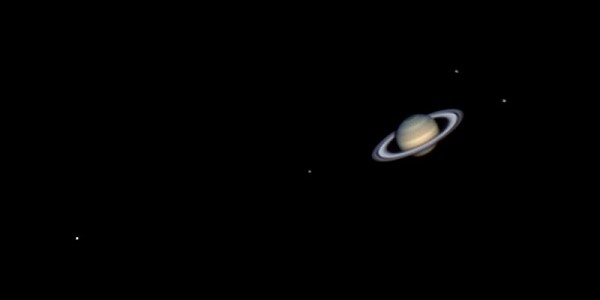
Are you fascinated with celestial objects and want to document them on camera? If so, then astrophotography might be the perfect hobby for you to pursue. Astrophotography is the art of photographic celestial objects using a camera mounted on a telescope. The subject matter can include any celestial object, from the moon to the Milky Way.
If you are interested to know more about astrophotography, then this article is for you.
The Basics of Astrophotography
First, let’s start with the basics. By knowing the basic things, you can familiarize yourself with this type of photography and decide if it’s right for you or not.
Conditions
You need clear skies and a dark location for astrophotography. But to take good shots, you also need a good “seeing” and “transparency”. This refers to a condition where there’s a lack of atmospheric turbulence, as well as moisture and dust that could occur after heavy rain. Having perfect conditions will most likely result in a favorable outcome.
Preparation
You must be able to focus your camera and align the star tracker to take good shots. If you are not used to this, try to practice during the day. Looking for an infinity focus point on your lens is best done before dark by autofocusing on something as far as possible and magnifying the image using “live view”. Take note of where infinity focus is on your lens before switching to manual focus. Next, perform polar alignment with the help of the polariscope that’s built into the tracker. The exact placement of Polaris will mainly depend on your latitude and the time of the night.
Camera Settings
As a photographer, you’re surely aware that photography is all about balancing the aperture, ISO, and shutter speed or exposure time, and this will also be applicable for astrophotography. Begin by using the aperture that’s as wide as where the lens can go. Perhaps, around f/4.5 for a zoom lens or f/2.8 for the wide-angle lens. Since bright conditions require an ISO 100, consider using ISO 800 for astrophotography as it offers far more sensitivity, although ISO 1600 or 3200 can also work better depending on how powerful your camera is. As for the shutter speed, start at 30 seconds and eventually increase. Regardless of the camera settings, avoid camera shake as this could affect the quality of the shots. Consider using a remote shutter instead of pressing the camera yourself.
Taking the shot
When starting with astrophotography shots, experiment with a variety of settings and see what works best. If you are using a wide-angle lens, opt for a long exposure to the Milky Way during late spring and summer. Whatever you choose to do, always shoot in RAW instead of JPEG. That way, you can use photo editing software like Photoshop or Corel to enhance the image quality.
Equipment for Astrophotography
You don’t need to invest in expensive equipment and gears to pursue astrophotography. In fact, you only need the following basic equipment to get started. First decide whether you are shooting as a hobby and post the images on your Instagram account or you want to pursue a profession out of it. Your equipment selection will vary based on your shooting objective.
Camera
Of course, as with any genre of photography, you will need a camera to pursue astrophotography. You can use any DSLR or mirrorless camera that comes with a manual mode. Since objects in the deep sky are faint, focusing on them would require opening the shutter for as long as 90 seconds to allow enough light to hit the digital sensor. You will also need a 38mm ball-head mount so that the camera can independently move from the tracker once it’s in a fixed position.
Camera Lens
Using a relatively basic star tracker, you should be able to experiment with both the medium focal length and wide-field DSLR lenses. Remember that the type of lens you will use can affect the magnification. This, in turn, can also affect the amount of blur in the finished photo. For longer exposures, wide-angle lenses may be used instead of telephoto lenses, just before the stars begin to trail.
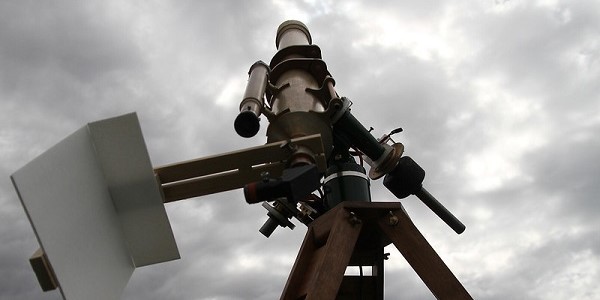
Star Tracker Mount
Remember that the earth rotates fast, at a speed of about 1,600km/h. Since you will be taking long-exposure photographs, your camera should be able to move in sync with the stars to keep them from appearing blurry in your photos. Therefore, you will need a lightweight star tracker or a small EQ3 equatorial mount. These are motorized equatorial mounts that are very portable and features easy polar alignment.
Some Tips to Keep In Mind
By now, you’re probably eager to get started with astrophotography. But before anything else, here are more tips to keep in mind:
- Switch your camera to manual mode so you will have full control over the camera’s settings.
- Look for a good location from where to take an astrophoto. Look for a dark spot that’s far from light pollution and where you will stand a chance to see a clear sky full of stars.
- Be mindful of your camera’s exposure. A slow shutter speed of around 20 seconds should be enough to collect plenty of star lights. For speed less than 30 seconds, consider switching to the B function and utilize the cable release.
- Make sure to check the ISO as well since it controls the sensitivity, and will therefore affect the overall result. Higher ISOs are more sensitive, which means they will reveal more stars in your astrophoto but at the expense of the quality, and could result in a grainy image.
- When taking astrophoto, consider turn on the noise reduction feature in your camera. You will find this on the menu. Reducing the noise could improve the quality of the image.
- Make sure to choose the right lens. If possible, opt for a wide-angle lens. This will allow you to capture a wide array of interesting celestial objects, including dust lanes, star clusters, and even planets.
- Keep your camera as steady as possible because even the slightest movement could significantly affect the quality of your astrophoto. Use a steady tripod and a cable release to minimize movement caused by your finger.